Difference between revisions of "Zoidberg II, powering robot fish"
MarcoPerri (Talk | contribs) (→Videos of the actuator tests) |
MarcoPerri (Talk | contribs) (→State of the art) |
||
| Line 52: | Line 52: | ||
=== State of the art === | === State of the art === | ||
| + | |||
| + | |||
The work that mostly influenced the design of our robot is a lower-scale automaton realized by Z. Wang, G. Hang, J. Li, Y. Wang and K. Xiao, which is actuated with the same type of SMA that we used. | The work that mostly influenced the design of our robot is a lower-scale automaton realized by Z. Wang, G. Hang, J. Li, Y. Wang and K. Xiao, which is actuated with the same type of SMA that we used. | ||
Revision as of 17:48, 28 October 2009
Part 1: project profile
Project name
Zoidberg II, powering robot fish
Project short description
This project is aimed at designing, constructing and improving autonomous robot fish, starting from the ZOIDBERG project. It will be able to swim deeply in the water, to communicate and to orient in a free space thanks to several sensors mounted on-board.
Dates
Start date: 2008/11/01
End date: 2009/12/23
People involved
Project head(s)
Prof. Gini Giuseppina - User:GiuseppinaGini
Other Politecnico di Milano people
Ing. Paolo Belluco - User:PaoloBelluco
Students currently working on the project
Andrea Parolina - User:AndreaParolina
Dario Simontacchi - User:DarioSimontacchi
Marco Perri - User:MarcoPerri
Students who worked on the project in the past
Francesco Milli - User:FrancescoMilli
Maurizio Mercurio - User:MaurizioMercurio
Alessandro Nava - User:AlessandroNava
Laboratory work and risk analysis
Laboratory work for this project will be mainly performed at AIRLab/Lambrate. It will include significant amounts of mechanical work as well as of electrical and electronic activity. Potentially risky activities are the following:
Use of mechanical tools. Standard safety measures described in Safety norms will be followed. Use of soldering iron. Standard safety measures described in Safety norms will be followed. Use of high-voltage circuits. Special gloves and a current limiter will be used. Robot testing. Standard safety measures described in Safety norms will be followed.
Part 2: project description
The project is composed by:
- State of the art;
- Preliminary studies and sketches;
- Design notes and guidelines;
- Description and results of experiments;
State of the art
The work that mostly influenced the design of our robot is a lower-scale automaton realized by Z. Wang, G. Hang, J. Li, Y. Wang and K. Xiao, which is actuated with the same type of SMA that we used.
It is discussed in: A micro-robot fish with embedded SMA wire actuated flexible biomimetic fin
Preliminary part design
Mechanical structure
The design of the body has evolved into the current shape through many development steps, in response to the varying specifications of the on-board electronics, to changes in the manufacturing process of the hull, and for a better approach to the hydrostatic balance problem.
The first image below represents the model designed with CATIA software; it's shown inside the position and the shape of every component used. In the second there is the prototype realized with the high density polyurethane; it represents the left and the right part of the robot fish disposed on horizontal plane. In the last image we can see the external skin in plastic, made with the thermoshaping technic.
In next images there are tools and machinery that we used to realize the structure of the robot fish.
Electronics
We have several boards: the main board control every functionality of the fish and contains a microcontroller unit (PIC18F4431), un Inertial Measurement Unit (ADIS16360), a thermometer sensor for internal temperature (ADT7301), a circuit to detect battery status and all connectors to the other boards.
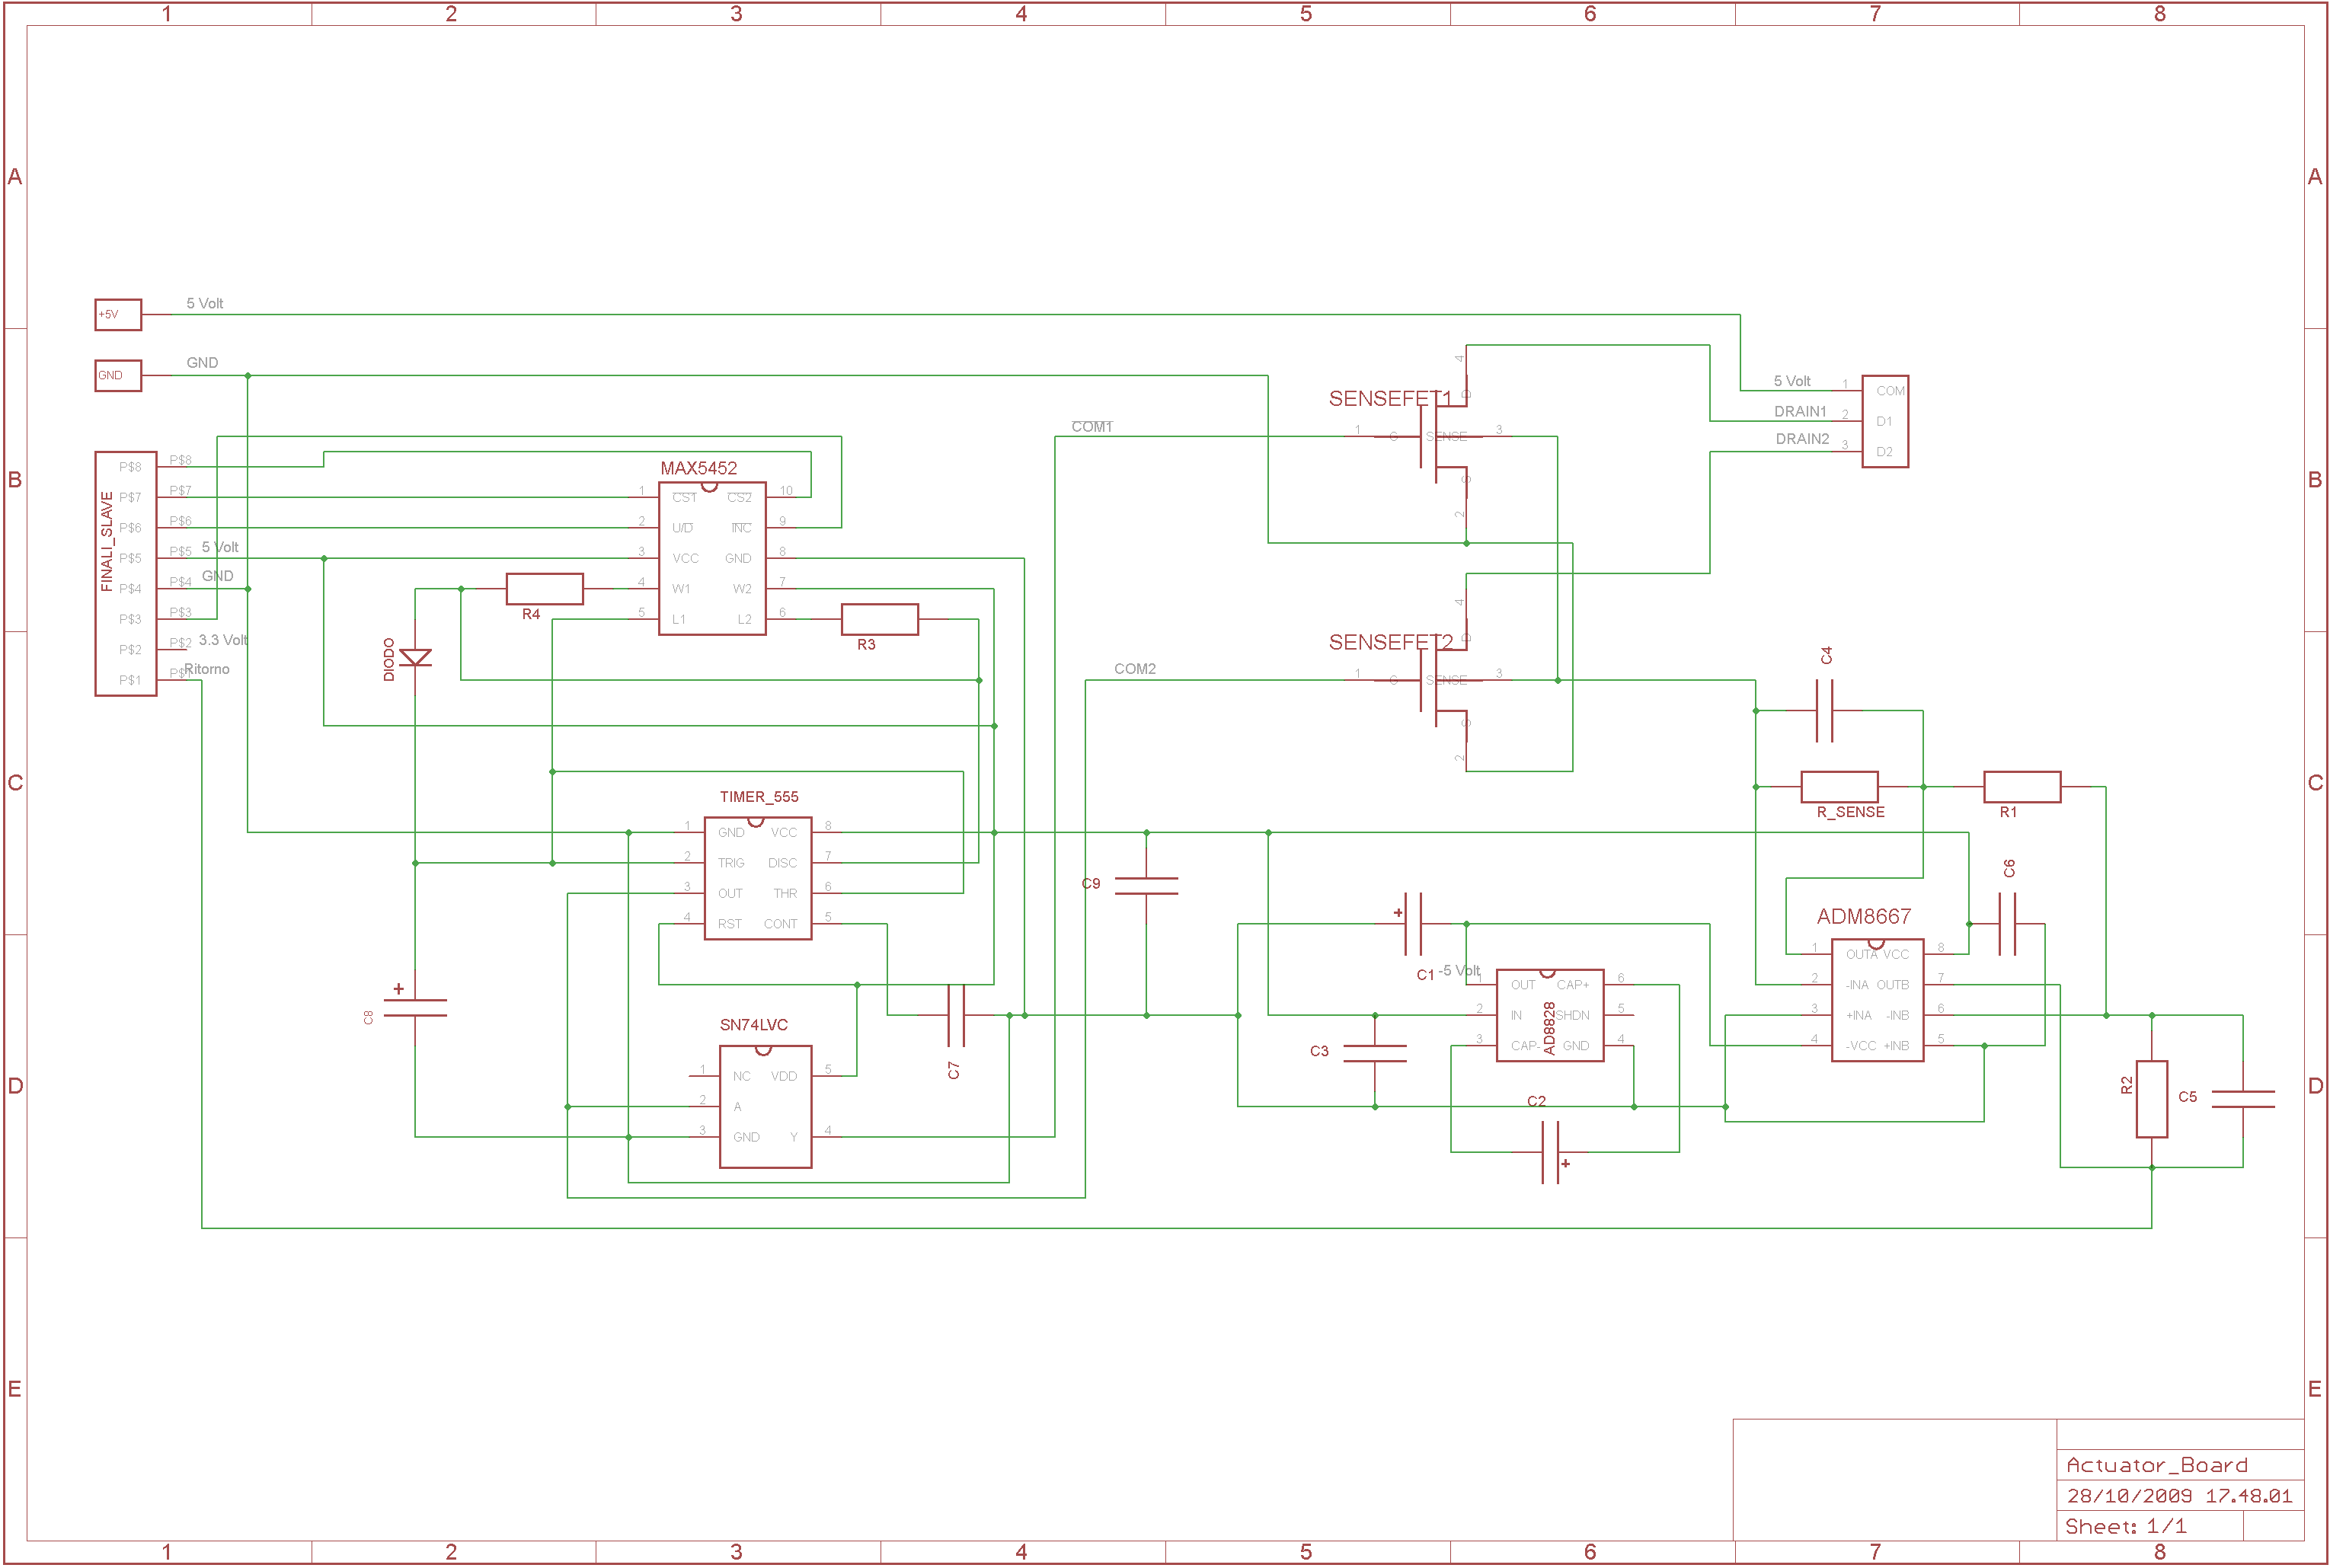
The pressure board include an SCP-1000 SPI sensor to check pressure informations and external temperature. In the proximity board there are the Sharp GD2P120 Ultrared sensor to control the distance between robot and obstacles and four photoresistor to detect the position of light coming externally. Final board is the actuator board used to control fin movements and check fin's current. This value is send to microcontroller which decides autonomously if this current should be increased or decreased.
Below are shown all the schematics and first test circuit, based on a 555 chip.
Videos of the actuator tests
Here are some clips, filmed during the first experiments trying to have a working actuator. It's the first prototype, handly realized in wood. In the videos we can see the two principal movements of the robot: in the first we have straight swimming and in the latter we have turning move.


